How to configure Apple Mail 3.0 for your TDS email account
- Open Apple Mail.
- Click Mail, and select preferences.
- Click the Accounts button toward the top of the screen.
- Highlight your existing email account on the left side (or create new) *Warning* If an existing email account is deleted, all current settings, folders, and emails associated with that account will be lost. It is recommended that you edit an existing account instead of deleting it.
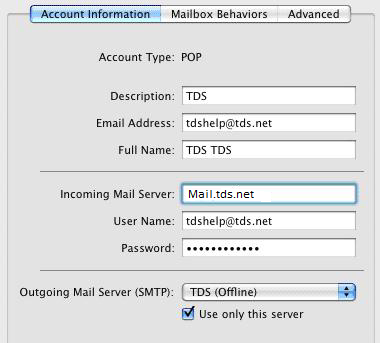
- Update the settings on this page as follows:
-Description: TDS
-Email Address: Your full TDS email address
-Full Name: Enter your name as you would like it to appear in the "From:" field of outgoing messages.
-Incoming Mail Server: Mail.tds.net
-Username: Your full TDS email address
-Password: Your TDS email password
-Outgoing Mail Server (SMTP): mail.tds.net
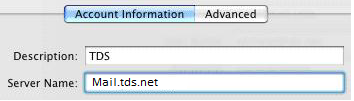
- Click on the drop down menu next to Outgoing Mail Server (SMTP) and select Edit Server List.

- Highlight the current server name.
- Click on the Account Information tab and update the server name to mail.tds.net
- Click on the Advanced tab and change the following:
-Check Use Secure Sockets Layer (SSL).
-Set the Server Port to 587
-Set Authentication to Password
-User Name: Your full TDs email address
-Password: Your TDS email password
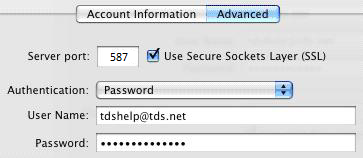
- Click OK at the bottom of the window.
- Click on the Advanced tab and update the server settings as follows:
-Check the box next to Use SSL
-Make sure the Port is set to 995
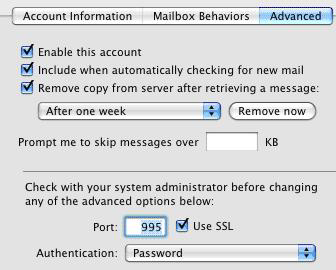
- Click the Close (X) button in the upper left hand corner of the screen.
- Click the Save button. Congratulations! You've completed configuring your client to send and retrieve messages!